- Remove any existing lights (if applicable): If your golf cart has old lights, remove them by disconnecting the wiring and unfastening the mounting hardware.
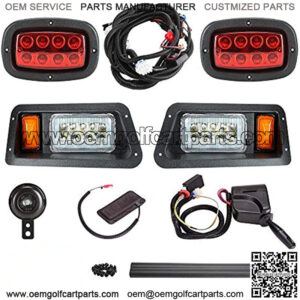
- Mount the headlights and taillights: Carefully attach the new LED headlights and taillights to their designated positions on the front and rear of the golf cart. Use the provided mounting hardware and secure them tightly, ensuring they are aimed correctly for optimal visibility.
- Route the wiring harness: Lay out the wiring harness and route it to connect the lights to the power source. Make sure to keep the wires away from moving parts, sharp edges, or hot surfaces to avoid potential damage or hazards.
- Connect the wiring: Follow the instructions provided with the LED light kit to connect the wiring properly. Usually, you’ll have to connect the positive and negative wires to the corresponding terminals on the battery or designated power source.
- Install switches and controls: Some LED light kits come with switches and controls for turning the lights on and off. Install these switches in a convenient location on the dashboard or control panel of the golf cart.
- Check connections and functionality: After completing the installation, double-check all the connections and ensure everything is secure. Test the lights and switches to make sure they work correctly.
- Secure loose wires: Use zip ties or cable clamps to secure any loose wires and prevent them from dangling or getting in the way of other components.
how to install lights on a golf cart
installing golf cart light kit